Repairing the Generators is the primary goal of all Survivors, to escape through the Exit Gates from the Killer. However, Survivors have to fix 5 Generators in total to open the Exit while the Killer is searching for them.
To repair a Generator, the Survivor has to find and stay next to them. To start the repairing process, the player must hold the M1 button until the Generator is fully repaired. During the repair process, Skill Checks may appear at any given moment.
At the start of each Trial, seven Generators will spawn on random positions. To speed up the progression, multiple Survivors can work on a single Generator or use items such as the Toolbox.
How long does it take to repair a Generator?
Because all Survivors have to repair 5 Generators to power the Exit Gates, a game can take quite some time. Sometimes 10-20 minutes, or even more (with extremely stealthy or non-productive teammates).
Fully repairing a Generator takes 80 seconds if no Items and Perks are used and no Skill Checks are failed. If two Survivors work on a Generator, repairing takes 47.06 seconds, with three players 38.1 seconds, and with four players 36.36 seconds.
As you can see, the difference between three and four players working on a Generator is only 1.74 seconds. That means it is not worth working with the whole team on a single Generator. Instead, one player should focus on another Generator or finding the Hex Totem (if the Killer uses a Hex Perk).
Being able to complete a Gen in 38.1 seconds is quite fast; however, it can go even faster. If four Survivors work on a Generator while using the Perk Prove Thyself (Teachable Perk of Dwight Fairfield), it only takes 25.08 seconds to fully repair the Generator.
If only three Survivors work on it, it takes slightly longer, about 29.3 seconds in total. Of course, assuming that no player fails a Skill Check, and the Killer does not interrupt the repairing process.
Important Note: The effect of Prove Thyself is applied on top of the Repair speed already afflicted with the Efficiency Penalty and not on top of the default Repair speed
How many Generators need to be repaired for the Hatch to spawn?
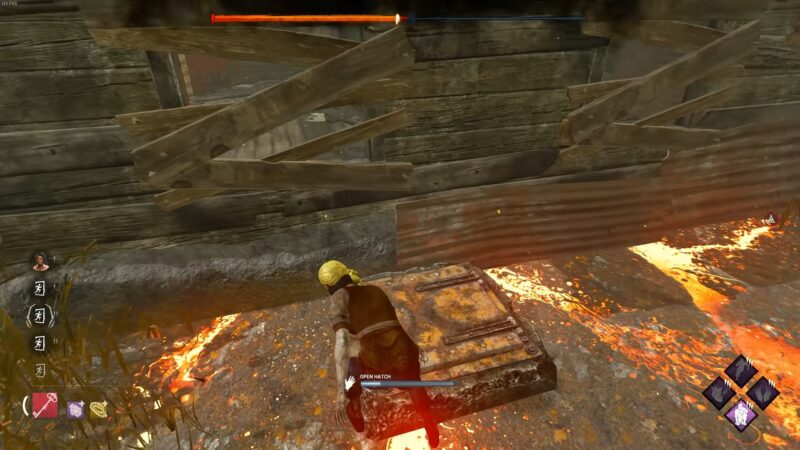
The Hatch, also known as Black Lock, is an alternative method for Survivors to escape the Trial. However, Survivors can’t jump into the Hatch right away, as a condition has to be met.
The Hatch will spawn in a random location of the map whenever the number of fully repaired Generators exceeds the number of living Survivors by 1. If four Survivors remain within the Trial, all five Generators have to be repaired. If only 3/2 Survivors remain, 2/1 Generators have to be repaired.
If there is only one Survivor still alive, the Hatch will spawn regardless of how many Generators remain to be repaired. Until the spawn condition is met, the Hatch will remain invisible on the map. Both Killer and Survivor cannot interact with the Hatch as long as it stays invisible.
Note: Survivors can still find the Hatch with a Rainbow Map or a regular Map, equipped with the Black Silk Cord Add-on. Click here if you want to know how to find the Hatch and where it can spawn.
The Hatch will open when only one Survivor is still alive, or it can be opened by using either the Skeleton Key or Dull Key Item. When a Survivor opens the Hatch with a Key, it will only remain open for 30 seconds, after which it closes itself again.
Whenever the Hatch remains open, the Killer has the option to close it by pressing the action button while staying next to the Hatch.
What does kicking a Generator do?
To slow down the Gen progression, all Killer own the ability to damage a Generator, also called “kicking.” There are also Perks such as Pop Goes The Weasel, Overcharge, or Brutal Strength, which speed up the kicking or apply other effects onto the Generator.
Whenever a Generator got damaged by the Killer, it will slowly lose repair progression until a Survivor resumes repairing or it regresses all the way. Until a Generator regresses from 99.99% to 0%, it takes a maximum of 320 seconds.
If the Killer has Pop Goes The Weasel (Teachable of the Clown) and kicks a Generator, it will immediately lose 25% of its progress. If the Killer kicks a Gen with Overcharge (Teachable of the Doctor), the next Survivor has to perform a tremendously difficult Skill Check. Failing the Skill Check will result in an additional 3/4/5% loss of progress.
Brutal Strength does not apply any effect, but it speeds up the kicking by 10/15/20%. Whenever Hex: Ruin is active, the Killer does not have to kick Generators because whenever no Survivor is repairing a Generator, it will automatically regress at 100/150/200% of the normal regressing speed (0.5 c/s).
What are the best Generator Perks in Dead by Daylight?
Each character in Dead by Daylight comes with three unique Teachable Perks, which can be unlocked at a character level of 30/35/40 for 5.000 Bloodpoints. Additionally, some Perks can be found in the Bloodweb from the very start.
The best Generator Perks for Survivors are Prove Thyself and Technician. For Killers, the best Gen Perks are Corrupt Intervention, Hex: Ruin, Pop Goes The Weasel, and Discordance.
Prove Thyself works best if multiple Survivors work on a Generator, as it removes 15% per Survivor from the Efficiency Penalty. Technician prevents the Generator from exploding if the player fails a Skill Check so that the Killer won’t receive a notification. If you’re not the best hitting Skill Checks, consider to try out Technician.
On the other hand, Corrupt Intervention is a powerful early-game Perk, which prevents all Survivors from repairing the three farthest Generators from your location. Since Hex: Ruin got reworked, Corrupt Intervention is one of the best alternatives. That said, Hex: Ruin is still useable and works on many Perk builds pretty well.
As mentioned, if the Killer runs Pop Goes The Weasel and kicks a Generator, it will lose 25% of progress immediately. That is quite strong, especially if you kick Gens that are almost completed. Pop is a popular Perk on Killers with large map coverage, such as Freddy, Billy, or Nurse.
Discordance is a tracking Perk, which activates whenever two or more Survivors work on a Generator, and marks it with a yellow Aura. Quite helpful if you’re looking for the next chase.

Prove Thyself:
For each Survivor working on a Generator within 4 meters, gain a stack-able 15% Repair speed bonus up to a maximum of 45%.
This effect is also applied to all other Survivors within range. Gain 50/75/100% more Bloodpoints for cooperative Actions. Prove Thyself does not stack with other instances of itself.

Technician:
You are apt at handling machinery with the greatest care and precision. The Hearing distance of noises caused by your Repairs is reduced by 8 meters.
On a failed Repair Skill Check, the following effects happen:
- The Generator Explosion will be prevented.
- The Generator loses Repair progress as usual.
- An additional Regression penalty of 5/4/3% is applied.

Corrupt Intervention:
Your prayers invoke a dark power that meddles with the Survivors’ chances of survival.
3 Generators located farthest from you are blocked by The Entity for 80/100/120 seconds at the start of the Trial.
Survivors cannot repair the Generators for the duration Corrupt Intervention is active.

Hex: Ruin:
A Hex that affects all Survivor’s Generator Repair progress.
Whenever a Generator is not being repaired by a Survivor, it will immediately and automatically regress its Repair progress at 100/150/200 % of the normal Regression speed.
Hex: Ruin affects all Generators. The Hex effects persist as long as the related Hex Totem is standing.

Pop Goes The Weasel:
A deep bond with The Entity unlocks great strength.
After hooking a Survivor, the next Generator you damage is instantly loses 25% of its progress.
Normal Generator Regression applies after the Damage Generator action.
Pop Goes the Weasel is active for 35/40/45 seconds after the Survivor is hooked.

Discordance:
Any Generator within a range of 64/96/128metres that is being repaired by 2 or more Survivors is marked by a yellow Aura.
When the Generator is first highlighted, Discordance triggers a Loud Noise notification on the Generator.
After the Generator is no longer within range or is being repaired by just 1 Survivor, the highlighted Aura remains for another 4 seconds.
Conclusion
As we draw the curtain on this comprehensive guide to mastering generators in Dead By Daylight, it’s clear that the game’s strategy is as intricate as it is thrilling. The dance between Survivors and the Killer, the tension of repairing generators while evading a relentless pursuer, and the strategic use of perks and items all contribute to the game’s unique charm.
The act of repairing generators is a test of skill and nerve, with the constant threat of Skill Checks and the looming presence of the Killer. The time it takes to repair a generator can vary greatly, from a lengthy 80 seconds when working alone and without perks, to a swift 25.08 seconds with a team of four using the Prove Thyself perk. This highlights the importance of teamwork and strategic use of perks in achieving your primary goal as a Survivor.
The Hatch, an alternative escape route, adds another layer of strategy to the game. Its appearance is tied to the number of Survivors left and the number of generators repaired, making it a beacon of hope for the last Survivor standing or a team that has managed to repair the necessary generators.
The Killer, on the other hand, has tools at their disposal to slow down the Survivors’ progress. By kicking a generator, they can cause it to regress, undoing the Survivors’ hard work. The use of perks like Pop Goes The Weasel and Overcharge can further enhance this ability, making the Killer a formidable opponent.
The choice of perks can greatly influence the outcome of a game. For Survivors, Proving Thyself and Technician are invaluable for speeding up repairs and avoiding detection, respectively. Killers, on the other hand, can benefit from perks like Corrupt Intervention, Hex: Ruin, Pop Goes The Weasel, and Discordance to stall the Survivors and keep track of their activities.
In conclusion, mastering the mechanics of generators in Dead By Daylight is a crucial step towards becoming a successful Survivor or a feared Killer. Whether you’re working together with your team to power up the Exit Gates, or using your abilities as the Killer to keep the Survivors in your grasp, understanding these mechanics will undoubtedly give you an edge in this game of cat and mouse. Happy gaming!