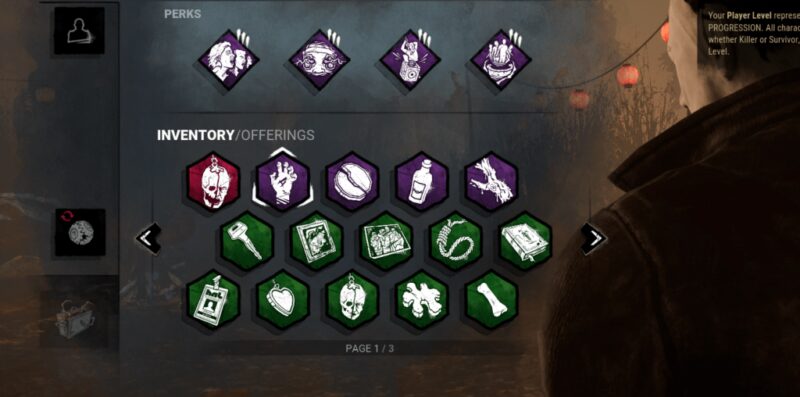
Behaviour Interactive‘s popular survival horror game features over 46 different characters, each coming with its own unique Perks. Perks can make a big difference in gameplay for both killers and survivors. So, what are the best perks for both roles?
Here’s a list of some of the best Perks in Dead by Daylight:
| Barbecue & Chilli | Decisive Strike |
| Make Your Choice | Borrowed Time |
| Corrupt Intervention | Dead Hard |
| Pop Goes The Wease | Adrenaline |
What are the best Killer Perks in Dead by Daylight?
If you chose to play as the Killer in DBD, you can select up to four different Perks from a pool of 78 in total. However, not all of them are great, and running them in a match can make it harder to win.

Corrupt Intervention:
Your prayers invoke a dark power that meddles with the Survivors’ chances of survival. 3 Generators located farthest from you are blocked by The Entity for 80/100/120 seconds at the start of the Trial.
Survivors cannot repair the Generators for the duration Corrupt Intervention is active.
Since Hex: Ruin got reworked, survivors now can rush Generators without more difficult skill checks. Corrupt Intervention is an excellent alternative to Hex: Ruin, as survivors, cannot work on Generators for 120 seconds, which are located farthest away from you.
They now have to come closer to your side, making it easier to find them. However, you should aim for Corrupt Intervention on level 3 for the best results.

Barbecue & Chilli:
A deep bond with The Entity unlocks potential in one’s Aura-reading ability. After hooking a Survivor, all other Survivors’ Auras are revealed to you for 4 seconds when they are farther than 40 meters from the Hook.
Each Time a Survivor is hooked for the first time, gain a 25% stack-able bonus to all Bloodpoint gains up to a maximum of 50/75/100%.
Barbecue is one of the best and most-played Killer Perks in Dead by Daylight because you can gain lots of additional blood points, and whenever you hook a survivor, The Entity shows you the aura of all survivors on the map for a few seconds.
B&C can be used on all Killers, but it works best with fast Killers, such as the Hillbilly, Nurse, Oni, and Spirit. Barbecue & Chilli is not the only Perk that lets you see the aura of survivors, but the bonus blood points at the end of a trial are definitely worth it.

Make Your Choice:
When a Survivor rescues another Survivor from a Hook that is at least 32 meters away from you, Make Your Choice triggers and applies the Exposed Status Effect on the rescuer for 40/50/60 seconds. Make Your Choice has a cooldown of 40/50/60 seconds.
Make Your Choice is a teachable perk from The Pig and counts as a reliable perk for many Killers. MYC doesn’t help to end a long chase quickly like Bamboozle, but if you chose the right Survivor after they un-hooked another, you can instantly put him into the Dying State.
Unfortunately, Make Your Choice only lasts for 60 seconds on level three, so you have to find the right Survivor within that time frame, which can be difficult. It works best on Killers, which can travel large distances quickly, like Nurse, Hillbilly, Hag, Oni, Freddy, Demogorgon, or Spirit.
Remember that you have to be at least 32 meters away from the Hook so Make Your Choice can activate.

Pop Goes The Weasel:
A deep bond with The Entity unlocks great strength. After hooking a Survivor, the next Generator you damage instantly loses 25 % of its progress.
Normal Generator Regression applies after the Damage Generator action. Pop Goes the Weasel is active for 35/40/45 seconds after the Survivor is hooked.
Pop is another great perk for slowing down the game. Whenever you hook a survivor, Pop Goes The Weasel activates for 45 seconds. During this time, when you kick a Generator, the repair progress will go back by 25% instantly.
That is very painful for survivors, especially if you run Perks that slow down the repair progress even more, such as Thanatophobia.

Sloppy Butcher:
You know where to hit to make them bleed.
Wounds inflicted by successful attacks slightly/moderately/considerably increase the Survivor’s bleeding frequency and cause the Mangled Status Effect.
Haemorrhage and Mangled effects caused by Sloppy Butcher return to normal once the Survivor is fully healed.
Sloppy Butcher got more and more popular after Hex: Ruin received its rework and is now a great perk for many Killers. After successfully hitting a Survivor, he will receive the Mangled Status Effect, which applies a 20% debuff on healing actions.
Without the Mangled effect, healing a Survivor takes 16 seconds, but with the effect, it will take 19.2 seconds. So, Sloppy Butcher is excellent to waste a survivor’s time, when he can’t work on a Generator.

Bamboozle:
Your Vault speed is 5/10/15 % faster. Performing a Vault action calls upon The Entity to block that Vault location for 8/12/16 seconds.
Only one Vault location may be blocked this way at any given time. The Vault location is blocked only for Survivors. Bamboozle does not affect Pallets.
Bamboozle is one of the best Killer Perks to end chases quickly in Dead by Daylight. Whenever the Killer vaults a window, it will be blocked by The Entity up to 16 seconds for all survivors.
However, if the Killer vaults another window, the first window will be unblocked immediately. Bamboozle works excellent on almost all Killers (except Nurse) and is ideal for ending a chase in the Killer Shack.

Infectious Fright:
The cries of the unfaithful make your heart leap. Any Survivors that are within the Killer’s Terror Radius while another Survivor is put into the Dying State by any means will yell and reveal their current location to the Killer for 4/5/6 seconds.
If you’re not the best at finding survivors on the map after downing one, Infectious Fright is your best choice. After downing a survivor, all other survivors within your Terror Radios will scream and reveal their current location for a few seconds.
Perks that increase the Killers Terror Radius such as Distressing or Monitor & Abuse work well with Infectious, but running another perk that reveals auras may be a waste of a perk slot.
Infectious Fright works best on fast Killers like Oni, Hillbilly, or Nurse, so that you can chase the next target as quickly as possible.

Monitor & Abuse:
Meticulous in your approach, terrifying in your application. While in a Chase, your Terror Radius is increased by 8 meters.
Otherwise, your Terror Radius is decreased by 8 meters and your Field of View is increased by 3/5/10 °.
Whenever a Killer comes closer to a Survivor, the Terror Radius sets in. Some Killers have a large Terror Radius, so Survivors have more time to hide. However, with Monitor & Abuse, the Killer can reduce his Terror Radius by 8 meters (if he’s not in a chase).
Monitor & Abuse works best on fast Killers, including Michael Myers, Oni, Blight, Legion, and Nurse, but also on slower ones like Trapper or Huntress.

Enduring:
You are resilient to pain. The duration of Pallet stuns is reduced by 40/45/50%.
Ending a chase quickly sometimes requires taking a pallet as Killer to get the Survivor to a better place. Enduring is not a complex perk with many effects, but the duration of Pallet stuns is reduced by 40/45/50%.
Killers that can break Pallets with their power don’t need to run Enduring. That said Hillbilly players like to run Enduring to recover quicker if they get stunned by a pallet (so they can get up the Chainsaw again).
Enduring works well on Killers like the Pig, Michael Myers, Legion, Clown, Wraith, or Blight.

Hex: Devour Hope:
A Hex rooting its power on hope. The false hope of Survivors ignites your hunger. When a Survivor is rescued from a Hook at least 24 meters away, Devour Hope receives a Token.
2 Tokens: Gain a 3/4/5 % Haste Status Effect 10 seconds after hooking a Survivor, for a duration of 10 seconds.
3 Tokens: Survivors suffer from the Exposed Status Effect.
5 Tokens: Grants the ability to kill Survivors by your own hand.
The Hex effects persist as long as the related Hex Totem is standing.
Hex: Devour Hope is not a perk that provides value to the Killer instantly. By hooking Survivors, the Killer gains tokens, which activate effects when a certain amount is reached.
With three tokens, the Killer can instantly put Survivors into the Dying State, and with five tokens, Devour Hope grants the ability to kill Survivors by your own hand.
Unfortunately for the Killer, Survivors can deactivate Devour Hope by cleansing the coursed Hex Totem. When the Hex Totem is broken, Hex Devour Hope cannot be activated again.
What are the best Survivor Perks in Dead by Daylight?
Over the years, Behaviour Interactive added more and more new characters, some original and some licensed. Currently, there are 24 Survivors, each coming with three Teachable Perks.
If you chose to play as a Survivor, you can select four Perks from a pool of 86 Perks in total. Remember, when playing the Survivor role, you don’t have to think about which Perks work best on each Survivor.

Borrowed Time:
You are fuelled with an unexpected energy when saving an Ally from a Hook within the Killer’s Terror Radius. For 10/12/15 seconds after unhooking a Survivor within the Killer’s Terror Radius, the unhooked Survivor is protected by the Endurance Status Effect.
Any damage taken that would put the Survivor into the Dying State will instead trigger the Deep Wound Status Effect, after which the Survivor has 20 seconds to Mend themselves.
Taking any damage while under the effect of Deep Wound or if its timer runs out will put the Survivor into the Dying State.
Unhooking another Survivor within the Killers Terror Radius is quite risky and often leads to farming the unhooked person instead. That said, if you unhook a Survivor within the Killers Terror Radius, he will be protected by the Endurance Status Effect, so he can escape from the Killer to heal (or escape).

Decisive Strike:
Using whatever is at hand, you stab at your aggressor in an ultimate attempt to escape. After being unhooked or unhooking yourself, Decisive Strike will become active and usable for 40/50/60 seconds.
While Decisive Strike is active, when grabbed by the Killer, succeed a Skill Check to automatically escape the Killer’s grasp and stun them for 5 seconds.
Being able to escape the Killer’s grasp with a simple action is very powerful and can turn around the entire game. Decisive Strike is one of the most powerful Survivor Perks in Dead by Daylight because of that.
Also, if you successfully hit the skill check for Decisive Strike, the Killer will be stunned for 5 seconds.

Spine Chill:
An unnatural tingle warns you of impending doom.
Get notified when the Killer is looking directly in your direction and standing within a range of 36 meters.
While Spine Chill is active, Skill Check trigger odds are increased by 10 % with success zones reduced by 10 %. While Spine Chill is active, your Repair, Healing, Sabotage, Unhooking, Vaulting, Cleansing, Exit Gate Opening, and Chest Unlocking speeds are increased by 2/4/6 %.
Some Killers in DBD can hide their Terror Radius with their power or use Perks that reduce the effective radius, such as Monitor & Abuse. However, Spine Chill will notify you if the Killer is looking directly in your direction within a range of 36 meters.
Spine Chill is an effective counter against Ghostface, Michael Myers, Spirit, Pig, Wraith, and other Killers that have stealth abilities.

Sprint Burst:
When starting to run, break into a sprint at 150% of your normal running speed for a maximum of 3 seconds. Causes the Exhausted Status Effect for 60/50/40 seconds.
Sprint Burst cannot be used when Exhausted. You do not recover from Exhaustion while running.
Creating distance between the Killer and a Survivor is not always possible, especially if there are no windows or Pallets nearby. That said, Sprint Burst is one of the best Perks for Survivors because it enables them to create distance to the Killer.
After activating, the Survivor will sprint at 150% movement speed for three seconds, which is enough to reach closed areas with more options (pallets, loops, and windows).
However, after Sprint Burst was used, it has a cooldown of 60/50/40 seconds, and you do not recover Exhaustion while running.

Dead Hard:
Activate-able Perk. You can take a beating. When Injured, tap into your adrenaline bank and dash forward quickly to avoid damage.
Press the Active Ability button while running to dash forward. During the dash, you avoid damage. Causes the Exhausted Status Effect for 60/50/40 seconds. Dead Hard cannot be used when Exhausted.
Dead Hard is one of the best Exhaustion Perks in Dead by Daylight, as it enables the user to bait a hit from the Killer. When activated, the Survivor will dash forward a short distance quickly, which can be used to reach a pallet or window to escape the Killer.

Adrenaline:
You are fuelled by unexpected energy when on the verge of escape.
Instantly heal one Health State and sprint at 150 % of your normal Running speed for 5 seconds when the Exit Gates are powered.
Adrenaline is on hold if you are disabled at the moment it triggers and will instead activate upon being freed. If playing against The Nightmare, Adrenaline will wake you from the Dream World upon activation.
Adrenaline ignores an existing Exhaustion timer.
Adrenaline triggers the Exhausted Status Effect for 60/50/40 seconds.
Adrenaline can completely turn the table for a Survivor, as when all Generators got repaired, one Health State will be healed instantly, and sprint at 150% of your normal Running speed for 5 seconds.
So, Adrenaline has a better version of Sprint Burst built-in. Five seconds of increased movement speed are enough to create a large distance to the Killer and reach Exit Gates. This is especially painful for slow Killers like the Huntress.

Deliverance:
After performing a Safe Hook Rescue on another Survivor, the Perk activates. You now have a 100 % chance to unhook yourself during the escape attempt.
A successful Deliverance from the Hook triggers the Broken Status Effect for 100/80/60 seconds.
Escaping from a hook without being unhooked from another Survivor is only a 4% chance, so it’s risky. Sometimes no other Survivor can get to you before you get sacrificed by The Entity, which is the point where Deliverance shines.
At some point within the match, you have to perform a Safe Hook Rescue to activate Deliverance. Now, if the Killer puts you on a hook, you can unhook yourself with a chance of 100%.
In situations where everyone is too far away from the Hook or the Killer is currently chasing someone, you can simply unhook yourself and take some pressure from your team.

Prove Thyself:
For each Survivor working on a Generator within 4 meters, gain a stack-able 15 % Repair speed bonus up to a maximum of 45%.
This effect is also applied to all other Survivors within range. Gain 50/75/100 % more Bloodpoints for cooperative Actions. Prove Thyself does not stack with other instances of itself.
Rushing Generators as a team is a viable strategy to escape in Dead by Daylight. If two or more Survivors work on a Gen together, it takes 47-36 seconds to complete him.
If one Survivor runs Prove Thyself, all survivors gain a stackable 15% Repair speed bonus (up to 45%), and a generator takes about ~25.08 seconds to be repaired if four Survivors work on it.

Deception:
Your adventures lifestyle requires moments of crafty misdirection.
Interact with a Locker while holding the Sprint button to trigger a Loud Noise notification for the Killer at your location instead of entering the Locker.
You will not leave any Scratch Marks for 3 seconds. Deception can only be triggered once every 60/50/40 seconds.
Mind games are a crucial factor in a chase for both Killers and Survivors. Lockers are spread out across each map and can be used for cheeky mind games.
If you run Deception on a Survivor and run beside a locker to trigger a notification for the Killer. If done right, the Killer will think that you went into the Locker, and he will check. However, because you will leave no Scratch Markt for 3 seconds, you can run to another location to hide.
But please remember, if the Killer sees you, don’t try to fake the Locker.

Balanced Landing:
Your agility is incomparable. Cat-like reflexes reduce your stagger duration from falls by 75 % and muffle your grunts from falling by 100 %. Upon landing, start sprinting at 150 % of your normal running speed for a maximum of 3 seconds if not exhausted.
Causes the Exhausted Status Effect for 60/50/40 seconds.
Balanced Landing cannot be used when Exhausted.
Jumping from high positions within a chase is risky, as it slows down your movement for a short time. Also, the Killer can hear the grunts of falling Survivors clearly.
However, a Balanced Landing removes most of the disadvantages, such as the grunts from falling, and reduces the stagger duration (the period where movement is limited). Additionally, you will start sprinting at 150% movement speed for 3 seconds.
Unfortunately, Balanced Landing requires lifted locations where you can jump from work. But on maps with many balconies like Haddonfield, Balanced Landing can be a bit overpowered (if the player knows the map well).
An exciting update: From the 5th of July, in Dead By Daylight coming new character portrayed by a renowned Hollywood actor! Stay tuned for this thrilling addition.
Frequently Asked Questions (FAQs)

1. What is Dead by Daylight, and how does it work?
Dead by Daylight is a popular asymmetric survival horror video game developed and published by Behaviour Interactive. The game pits one player, who assumes the role of a merciless killer, against four others, who play as survivors trying to evade the killer and escape the map. The game offers a variety of ‘perks’ that provide unique advantages to both survivors and killers, helping to shape each match’s dynamics.
2. What are the perks of Dead by Daylight, and why are they important?
Perks in Dead by Daylight are special abilities or bonuses that can give players an edge during gameplay. Each character has unique perks, which can be unlocked and used by other characters as you progress. They can fundamentally change the way you play, providing new strategies and options for survival or hunting.
3. Which perks are considered the best for survivors in Dead By Daylight?
While the “best” perks often depend on your personal playstyle and strategy, a few generally stand out. “Decisive Strike” is a favorite among many players because it provides a chance to escape the killer’s grasp. “Borrowed Time” and “Dead Hard” are also often praised for their ability to increase survival chances during critical moments.
4. Which are the best perks for killers in Dead By Daylight?
Much like with survivors, the best perks for killers can vary based on your style. However, “Hex: Ruin” is frequently chosen due to its ability to slow down survivor progress. Other notable killer perks include “Barbecue & Chili” for its post-hook information gathering, and “Nurse’s Calling,” which reveals healing survivors.
5. Can I change my perks during the game?
Perks cannot be changed during an ongoing match. However, you have the freedom to choose and adjust your perks on the loadout screen before the game begins. This offers a chance to experiment with different strategies and perk combinations.
6. What should I do if I make a mistake when choosing perks?
No worries! Learning is all part of the fun in Dead By Daylight. If you’ve chosen a perk that doesn’t quite suit your playstyle, simply choose different perks in your next game. The game encourages experimentation and adaptability, so feel free to try out different strategies until you find what works best for you.

