It doesn’t matter how powerful a gaming pc is or how good it looks if it produces a lot of noise. My previous gaming system, which I bought back in 2013, was pretty silent as first, but it made more and more noise over the years. In the end, without any headphones or a headset on, it was super annoying to sit next to the PC, just because it was so loud.
Now that I switched to another system let me give you some pro tips that help make your gaming PC a lot quieter.
- Switch To Silent PC Cases
- Install Quality Fans
- Switch From HDD To SSD
- Install Fan Speed Controller
- Use Certified Power Supplies
- Install Sound Isolation
- Replace Old Components
- Install A Powerful CPU Cooler
- Enhance The Airflow Inside The Case
However, before I start, please note that your PC can only be as silent as the loudest component. For instance, if you only buy silent parts, but a noisy HDD, you will hear it when the system is running.
1. Switch To Silent PC Cases:
The case can make a big difference in how much noise you can hear when the system is running. To get the best results, it is best to choose a case without open side panels and good build quality. The case should also provide good mounting options, so there are no vibrations that create unnecessary noise while gaming.
My previous PC case was pretty cheap, and thus, had many parts out of cheap plastic, which began to vibrate. Especially the side panels. Because of the vibrations, the case produces deafening sounds, which were incredibly annoying. The only option to stop the vibrations for a while was to screw in the side panels pretty hard, but this was definitely not the ideal way.
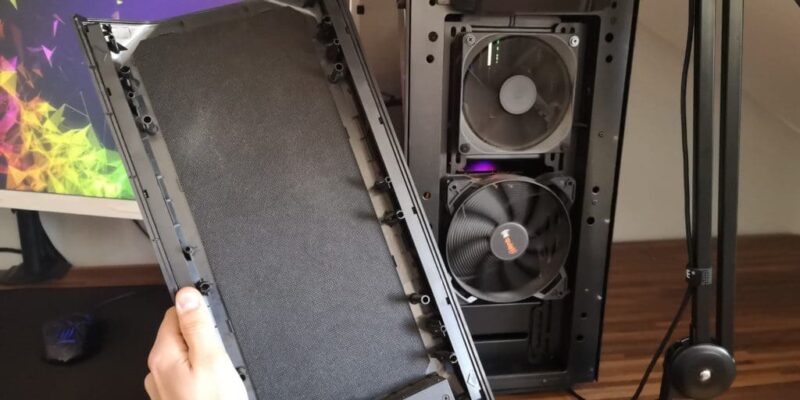
For my new custom gaming system, I use the be quiet! Pure Base 500, which is a high-quality case. Instead of plastic windows, this case uses thick glass panels, and the used metal/plastic parts are also much more durable. In comparison to the previous case, the Pure Base 500 is a lot quieter.
Decent cases sometimes also have special acoustic panels integrated, which reduce the outcoming noise even more. For increasing quality, the price also increases steadily; however, spending about $70-$100 is recommended.
2. Install Quality Fans:
Another component that makes a significant impact on the sound level of a gaming system are fans. When purchasing a brand new case, most case manufacturers install one or two fans already, so the future owner only has to install the other components. However, less expensive cases come with cheap fans most of the time. On the other hand, when buying a more expensive/premium case, most of them come with pretty good fans, which don’t need to be swapped out.
Fans can be purchased in different sizes, such as 80mm, 120mm, 140mm, and 200mm, but the case dictates the maximum size you can use. Most cases take advantage of multiple 140mm fans, as this size provides strong airflow throughout the case.
Premium fans who have high performance can be purchased from many manufacturers like be quiet!, and cost about $10-$20 depending on the size. Premium fans sometimes also feature anti-vibration mountings that minimize the transmission of vibrations to the PC case and other components.
3. Switch From HDD To SSD:
Today, hard drive storage and SSDs are relatively cheap and available in all different storage sizes, making it easy to find the right component for your system. HDD storage is still a good choice if you want to store a lot of data: however, they produce noise as there is a spinning disk in them. Hard drive units produce even more noise when processing a lot of data, for instance, when moving data to other storage drives.
In comparison, SSDs don’t produce any noise, as they don’t contain any moving parts. They can also store a couple of gigabytes of data easily, while still being faster than any HDD units. The only real disadvantage of an SSD as in comparison to a Hard Drive is that storage will cost more.
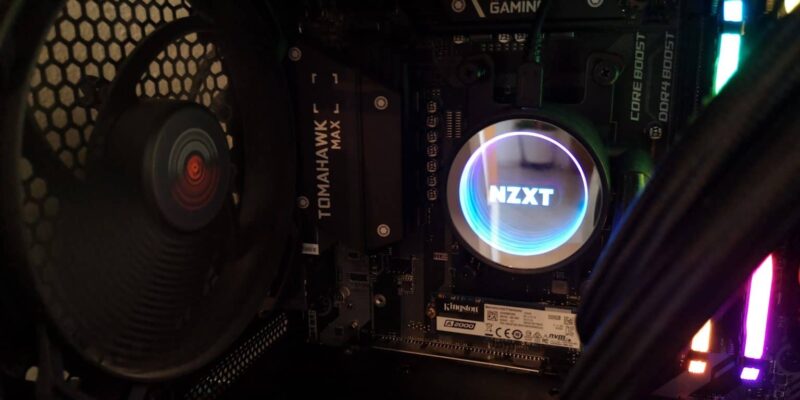
Side note: When purchasing any Hard Drive or SSD (M.2 SSDs included), check out its read-/writing speed per second. Decent storage drives should have at least up to 500 MB/s read-/writing speed, like the Kingston A2000 M.2, which I use myself.
4. Install Fan Speed Controller:
Besides replacing your cheap fans with a couple of premium fans, adjusting the fan speed is also a great option to make your PC a bit quieter. Free software like SpeedFan enables you to control and adjust all fans’ speeds in your gaming PC in a couple of minutes.
Fans can also be purchased with PWM, enabling you to control the fan’s speed with the motherboard, without any additional software needed. It also allows your system to boost the speed of all fans to increase the airflow for more cooling power. When the system doesn’t need a lot of cooling, it simply decreases the fan speed.
So, when purchasing new fans, make sure to check if the fan allows compatible 4-pin controllers to vary the speed of the fan.
5. Use Certified Power Supplies:
The power supply is one of the most fundamental components in a gaming PC, as it has to provide enough power, so all parts work without any issues. During a long gaming session, the power supply also heats up like a CPU and GPU, so it has to cool itself with an integrated fan. When going for a certified power supply, the integrated fan stays quiet, even at full speed.
Cheaper supplies from smaller manufacturers produce more noise than their premium counterparts because of lacking material and build quality. Going for a Platinum or Gold certified power supply decreases energy consumption and keeps the system quiet.
6. Install Sound Isolation:

Acoustic panels or sound isolation mats not only get used to mitigate noise and reduce the reverberation and echo in an area, but case manufacturers also use them to make their cases quieter. Usually, they can be found near open areas where fans are mounted, like in the front panel of be quiet’s Pure Base 500.
Installing some acoustic panels near your fans can decrease the sound level of the entire system, but you have to make sure the fans can still suck enough air into the system.
7. Replace Old Components:
If your system is a couple of years old, it is probably decently louder than on the first day of work. Over time, new components with better performance get released on the market, enabling us to make a system a bit quieter. Mostly older fans trend to vibrate more after a few years of running, so swapping them out for a new model is recommended.
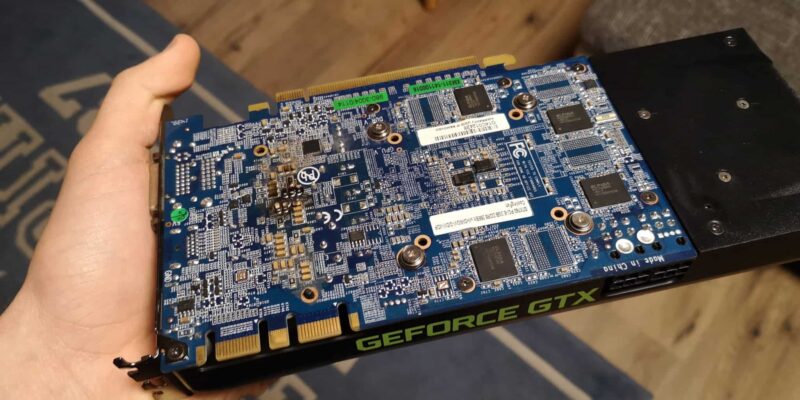
This also counts for components like the Graphics Card (GPU), which is the core of each gaming setup. Games became larger in size and more demanding because of better graphics, bigger worlds, or more effects. Older GPUs have to work a lot harder, resulting in increased heat production. To keep the GPU as cool as possible, all the integrated fans have to spin on max speed, which produces a lot of noise.
Adding a new and more powerful GPU to the system, like an Nvidia GeForce RTX 2070/2080 Super, guarantees that you can play all games on the highest settings, while still producing less noise.
Note that the graphics card is one of the most noise-producing components in a gaming setup, and it is possible to make an old GPU quieter with a bit of work.
8. Install A Powerful CPU Cooler:

To cool down a CPU, people can choose between water cooling systems or classic air cooling systems. AIO (All-In-One) water cooling systems can provide excellent cooling performance while still being very quiet. Still, they bring water into the system, which needs to be pumped to the CPU all the time, so there is always a bit of noise.
In contrast, CPU air coolers like the be quiet! Shadow Rock 3 features an impressive cooling performance while operating at only 24,4 dB(A) even at a max speed of 1,600 rpm, thanks to the Shadow Wings 2, 120mm high-speed fan.
Going for a slightly bigger fan cooler results in less noise, as the fan doesn’t have to spin at high speed to cool the CPU. Smaller fans have to spin much faster to produce the same cooling power, and thus, make more noise.
9. Enhance The Airflow Inside The Case
Probably one of the easiest ways to make your gaming PC quieter is to enhance the airflow inside of the case. Good airflow is crucial, so new cold air can get into the case, while hot air gets pushed out. If a system has not enough or no airflow at all, components can heat up to the point of a possible fire hazard.
And if you think that’s not possible, oh yes, it can happen under certain circumstances, and I experienced it by myself. After about 3 years of ownership of my first gaming setup, I replaced my graphics card because of the Platine cached fire.
 It was only a tiny and short flame, but enough to destroy the GPU’s palatine. This accident was because the PC had not enough airflow, so the GPU reached dangerously high temperatures.
To enhance the airflow of your gaming Pc, make sure to place the system in an open area, and not in a crowded area under your desk. Also, consider adding one or two additional fans to increase the amount of air that gets sucked into the case.
Why Is My Gaming PC So Loud?
There are many components inside a gaming PC, so you have to find the sound source first. Components that produce the most noise in a gaming system are fans, hard drive storage units, and GPUs.
If your gaming system gets louder while playing resource-demanding games, usually components heat up, and all the fans increase their rpm to increase cooling power. If you use fan controllers such as SpeedFan, the speed of each fan can be regulated.
If your gaming PC gets louder while moving a lot of data on an HDD, the HDD unit reaches its maximum read-/writing speed and thus produces more noise. SSD units don’t make any noise, as they don’t contain any moving parts.
Last but not least, a way to make sure your gaming PC stays quiet is to keep him free from dust. A dusty PC not only looks awful, but dust also makes components like the GPU heat up more quickly, so the fans have to spin faster. Premium and mid-tier cases sometimes feature a couple of dust filters at the bottom and in the front of the case, which should be cleaned every few days (or weeks).
F
If the filters are full of dust, less fresh air can be sucked into the case, but more dust can be sucked in.
Frequently Asked Questions (FAQ)

1: How about liquid cooling? Does it make my PC quieter?
Sure, liquid cooling can indeed make your PC quieter. They use water or other liquid coolants to keep your components cool and run quieter than traditional fan-based cooling methods. However, the pumps required to circulate the coolant might still generate some noise, albeit less than what most fans produce.
2: Will over-clocking my PC increase its noise levels?
Yes, usually. Overclocking is the process of pushing your CPU and GPU to run at speeds higher than their rated limits. This generates more heat, causing fans to spin faster and produce more noise. If you’re aiming for a quieter PC, excessive overclocking may not be the way to go.
3: How can I tell if my PC’s noise is a problem or just normal operation?
Well, it’s a bit subjective. A slight humming noise from your fans or drives is normal. However, if the noise becomes loud enough to distract you or you hear odd sounds like clicking, grinding, or whining, that might indicate a problem. This could range from loose components, and failing hardware, to poor airflow.
4: I’ve implemented all these measures, but my PC is still noisy. What’s the next step?
If your PC remains noisy after you’ve exhausted these suggestions, it might be worth consulting a professional. They can perform an in-depth analysis of your system and pinpoint the exact source of the noise. This could uncover underlying issues you may have missed, like a failing component or electrical issues.


