Picture this: you’re all set for an immersive gaming session, your adrenaline pumping, ready to dive into the virtual world. But as you pick up your trusty PS4 controller, you notice something off — the ominous red light. Fear not, fellow gamer, for we’ve got your back with this comprehensive guide on 7 Ways to Fix PS4 Controller Light Is Red!
In the upcoming sections, we’ll walk you through a multitude of solutions that vary in complexity, ranging from simple resets to more intricate technical fixes. By the end, we assure you that your controller will be back in action and ready to dominate any gaming challenge that comes your way. So, buckle up, and let’s dive headfirst into the world of PS4 controller troubleshooting, where we’ll conquer the nefarious red light once and for all!
1. Reset the PS4 Controller
Behold! The first technique to tackle that pesky red light is resetting your PS4 controller. As simple as it sounds, this method can work wonders, especially when you’re pressed for time. But how do you execute this fix?
Well, all it takes is a tiny object — say, a paper clip or the tip of a pen — to press the concealed Reset button. Situated at the back of your controller, you’ll find a minuscule hole, just waiting to be prodded. So, go ahead and press it gently for 10 seconds, then release it.
Next up: connect your controller to the console using a USB cable. Power up your PS4 and voilà! Your controller should be back in action, minus the red light.
But wait! What if this doesn’t work? Fret not, for we’ve got six more solutions up our sleeves!
2. Reconnect the Controller via Bluetooth

Lo and behold, we’ve arrived at our second method: reconnecting your controller via Bluetooth. This solution aims to iron out any connectivity issues that might be causing the red light to appear. So, without further ado, let’s embark on this step-by-step journey to restore your controller’s natural glow:
- Begin by turning off your PS4 completely. To do this, press and hold the power button until you hear two beeps, then release.
- While your console is off, grab your controller and press the PS and Share buttons simultaneously. Hold them down until the light bar starts to blink twice per second, indicating that it’s in pairing mode.
- Switch your PS4 back on. You can do this by pressing the power button again, but this time, wait for just one beep.
- Once your console has booted up, navigate to the Settings menu. From there, make your way to Devices, and finally, select Bluetooth Devices.
- As the list of available devices appears, look for your controller, typically named “Wireless Controller.” Click on it to initiate the pairing process.
- When the connection is successful, the red light should vanish, replaced by the familiar blue glow. Congratulations, your controller is now reconnected!
If this method doesn’t do the trick, worry not! We’ve still got five more solutions to explore, so stay tuned!
3. Charge the Controller Fully
At times, the simplest solutions are the most effective. Case in point: charging your PS4 controller fully. Yes, you read that right! A low battery could be the sneaky culprit behind that troublesome red light. So, let’s embark on a quest to rejuvenate your controller’s energy:
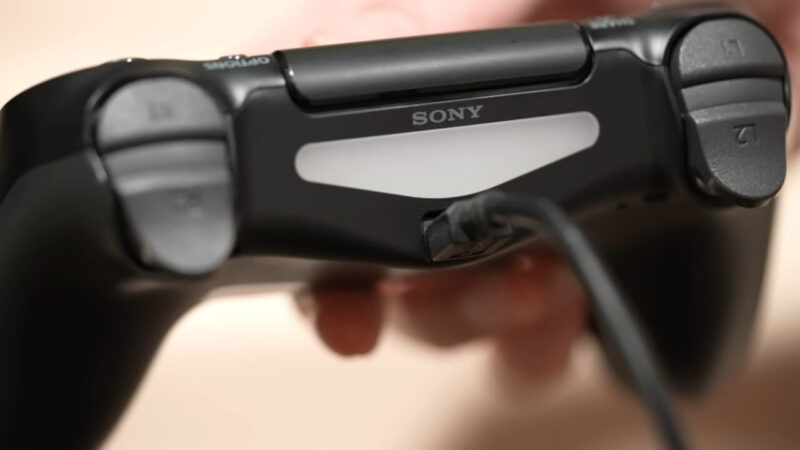
First, gather your trusty USB cable and connect it to your controller. Plug the other end into the PS4 console or a compatible USB charging device. Once connected, the light bar should begin pulsating, signaling that the charging process is underway.
Now, patience is key. Wait for your controller to charge fully, which may take a few hours. As the saying goes, good things come to those who wait, and in this case, a fully charged controller might just be the solution you need.
Once your controller is fully charged, the red light should vanish. If not, worry not, for we’ve got four more solutions up our sleeves, ready to be unleashed!
4. Update the PS4 Firmware
Could it be that an outdated PS4 firmware is the root of your red light woes? Indeed, it’s possible! By updating your console’s firmware, you’ll not only enhance its performance but also potentially resolve any controller-related issues. So, let’s dive into this step-by-step guide to bring your console up to speed:
- Power on your PS4 and ensure it’s connected to the internet. A stable connection is vital for a successful update.
- Navigate to the console’s main screen and select the Settings menu, followed by System Software Update.
- Your PS4 will now search for available updates. If one is found, the console will prompt you to download and install it. Select Update to initiate the process.
- As the update downloads, make sure not to turn off your console or disrupt its internet connection. Doing so may cause unwanted complications.
- Once the update is downloaded, your console will restart to install the new firmware. During this process, be patient and avoid interrupting the installation.
- After the installation is complete, your PS4 will restart once more. Now, check if the controller’s red light has disappeared. If so, congratulations! You’ve successfully updated your console and resolved the issue.
Should the red light persist, fear not! We still have three more solutions to explore in our quest to vanquish this troublesome foe.
5. Perform a Power Cycle on Your PS4
At times, a fresh start is all it takes to banish the pesky red light from your controller. Performing a power cycle on your PS4 can clear any temporary glitches or issues, potentially resolving the problem. So, let’s embark on this step-by-step journey to reboot your console and banish the red light:
- Begin by turning off your PS4 completely. Press and hold the power button on the console until you hear two beeps, then release. The system will shut down, and the light will turn off.
- Once your console is off, unplug the power cable from the back of the PS4. This ensures that all residual power is drained from the system, effectively resetting it.
- Wait for about five minutes to allow the console to rest. During this time, you can take a brief pause and stretch your legs or grab a snack.
- After the waiting period, reconnect the power cable to your PS4. Make sure it’s securely plugged in, then press the power button to turn on your console.
- With your PS4 up and running, check your controller for the red light. If it’s gone, rejoice! Your power cycle was a success. If not, don’t lose hope, for we have two more solutions to try!
Stay determined, as we continue to explore the remaining methods in our quest to conquer the red light and get you back to playing your favorite games! With Grand Theft Auto V waiting to be explored, you won’t want to let a little thing like a red light on your PS4 controller stop you.
6. Replace the Controller Battery
Alas, we’ve reached the point where it’s time to consider the possibility that your controller’s battery may be at the end of its life. Fear not, replacing the battery is a manageable task, and with a bit of patience, you’ll have your controller back in action in no time. So, let’s roll up our sleeves and dive into the battery replacement process:
First, gather the necessary tools: a small Phillips-head screwdriver, a replacement battery (preferably an original Sony battery), and a clean, well-lit workspace. Ensure that your controller is disconnected from your PS4 and powered off before proceeding.
Next, flip your controller over and locate the four screws on the back. Carefully remove them using the screwdriver, ensuring not to strip the screws or lose them.
With the screws removed, gently pry apart the two halves of the controller. Be cautious, as the internal components are delicate and can be damaged if handled roughly.
Inside, you’ll find the battery nestled in its compartment. Carefully disconnect the battery’s connector and remove the old battery. Replace it with the new one, making sure to connect the battery connector properly.
Once the new battery is in place, reassemble your controller by snapping the two halves back together and securing them with the four screws. Finally, connect your controller to the PS4 and check if the red light has disappeared.
If the red light persists, fear not! We have one final solution to explore in our quest to conquer the dreaded red light!
7. Use a Different USB Cable to Charge

As we near the end of our troubleshooting journey, it’s time to consider a potential issue that’s easy to overlook: a faulty USB cable. Yes, the very cable responsible for charging your controller could be the reason behind that troublesome red light. So, let’s grab a different cable and test our hypothesis:
First, find another USB cable compatible with your PS4 controller. The cable must be both undamaged and reliable, as a faulty cable will not solve the issue at hand.
Next, plug the new cable into your controller and connect the other end to your PS4 console or a compatible USB charging device. Observe the light bar for any signs of life, such as pulsating or flashing.
If the light bar responds as expected, indicating that the controller is charging, allow it to reach a full charge before testing it again. Should the red light disappear, congratulations! You’ve found the culprit and resolved the issue.
However, if the red light persists despite trying all of the suggested solutions, it may be time to seek professional assistance or consider purchasing a new controller. Remember, it’s always wise to consult the manufacturer’s support resources for further guidance.
Conclusion
In conclusion, dealing with a red light on your PS4 controller can be a frustrating experience, but with the right steps, you can troubleshoot and fix the problem. By following the tips and solutions outlined in this article, you should be able to get your controller back up and running in no time.
Remember to always take care when handling your gaming equipment, and to seek professional assistance if you’re unsure about any of the steps involved in fixing your controller. With a little patience and attention to detail, you can ensure that your gaming experience is always top-notch.
Frequently Asked Questions (FAQs)

1. What does the color of my PS4 controller’s light bar mean?
The light bar on your PS4 controller changes colors to indicate different things. For instance, when you’re playing a local co-op game, the colors represent different player numbers: blue for player one, red for player two, green for player three, and pink for player four. However, if your controller’s light is red and you’re not player two, it could indicate a problem with the controller.
2. How can I tell if my PS4 controller’s battery is dying?
If your PS4 controller’s battery is low, the light bar will blink red. However, if the controller’s light remains red even after charging, it could indicate a more serious issue, such as a faulty battery or a problem with the controller’s hardware.
3. What should I do if my PS4 controller’s light is red even after trying all the suggested solutions?
If you’ve tried all the suggested solutions and your PS4 controller’s light is still red, it might be time to seek professional help. You can contact Sony’s customer service for further assistance. Alternatively, you might want to consider purchasing a new controller.
4. Can third-party PS4 controllers also have the red light issue?
Yes, third-party PS4 controllers can also experience the red light issue. If you’re using a third-party controller and encounter this problem, the same troubleshooting steps should apply.


